How to Create an iCloud Shared Album
Whenever I go on a trip, I configure an iCloud Photo Sharing stream to send in-the-moment pictures to my friends and family. This is an easy, fun, and private way to share photos with other people. The folks you invite can even add their own comments and pictures! I enjoy it a lot.
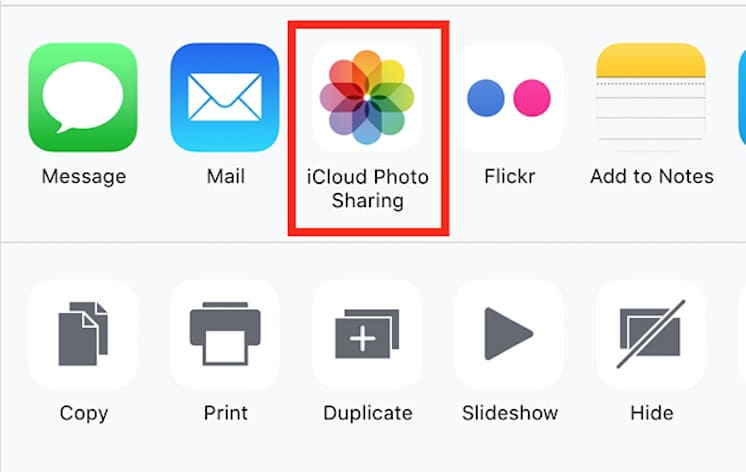
Setting up your own iCloud Shared Album is simple. First, open the Photos app on your Mac or iOS Device and select at least one picture to start the album with. Click on the Share Icon — depicted as a square with an arrow point out of the top — in the toolbar. Then choose iCloud Photo Sharing.
![]()
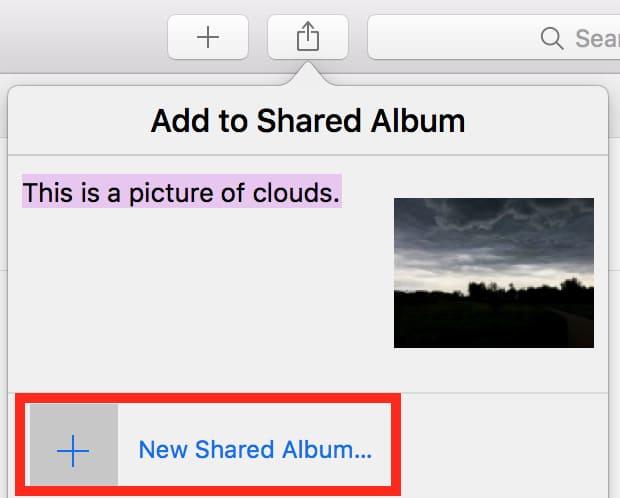
A new widow will appear in which you can optionally add a comment or caption to your photo. Next, click New Shared Album. If you’re setting up your Shared Album in iOS, you’ll tap Shared Album first, and then New Shared Album.
Next, give your iCloud Shared Album a title, and then invite people using the box in the middle. You can invite people via their email address or iMessage number. If you’d prefer to choose from your contacts list instead, select the plus button.

When the information is all filled out, click Create and you’re done! You can now continue to add more pictures to your Shared Album, or head off on your trip. Once you start making memories, you’ll find your iCloud Shared Album accessible from any of your iOS devices or Macs. Simply select your new photos, tap the Share icon, and select your existing Shared Album. The photos you upload will be immediately shared with the friends and family you invited when you created the album.
![]()
Related
For more information on iCloud Photo Sharing—including what to do if you can’t seem to turn it on at all—take a look at Apple’s support page.

0 Response to "How to Create an iCloud Shared Album"
Post a Comment