How to Install NetBeans to Write and Debug HTML on Your Mac for Free, Part I
You’re in an HTML class. Or you just want to learn HTML and maybe CSS. You want to write, test and debug your code without the fuss (and possible expense) of running a web server either locally or remotely. NetBeans on your Mac allows you to achieve that.

The Web Server Problem
In the course of learning to write HTML you will want to load your HTML code on a web server and connect to it with a web browser of choice. For example, Safari. But this presents some minor problems for the new student.
First, you could activate the Apache web server (httpd) on your Mac. It’s mildly hidden away, but the real issue is that it opens port 80 on your Mac to the outside world. Out of an abundance of caution, you may not wish to do that, especially if you’re inexperienced. If you really want to do that, however, here’s an article that shows how to activate Apache in macOS. “How to Set up Apache in macOS Sierra 10.12.” I believe this article still applies to High Sierra. (The path to Apache is still /usr/sbin/httpd.)
A less difficult avenue is to install and run Chuck Shotton’s MacHTTP. It’s a simpler Mac application with an obvious place to put your index.html file. Still, the security aspect remains an issue. A secondary issue is that you’ll likely end up writing your HTML code in a text editor, and there will be, in general, no obvious way to determine where your coding errors are. Or get in-app user help with HTML commands. (But see this excellent web tutorial.)
Even more troublesome for the beginner is to engage an ISP or web service, that charges you to host your website. The cost and the fuss of uploading constantly changing test code (and potential security issues) make this approach equally unsavory and inconvenient.
What would be ideal is to have a free, native Mac app that has a built-in Integrated Development Environment (IDE) with an editor, file resource manager, pop-up help and error messages. And a private web server, visible only to you. Well, there is one, and it’s called NetBeans. (By the way, it’s also available for Windows and Linux because it’s written in Java.)
Java Install
The latest version of Netbeans is version 8.2, is written in Java and uses Java 8. This is where you want to be. It used to be that the NetBeans install package included an installation of Java, but thanks to some confusion (and a conflict) with Java 9, this is no longer the case. Even though the NetBeans download package says Java is in there, it isn’t.
Step 1. Java 8. Download and install the latest version of Java 8. (macOS no longer ships with Java.) You’ll find this at the Oracle.com website. If you’re hesitant to install Java on your Mac’s boot version of macOS, you could, instead, run macOS as a virtual machine and do everything there.
[How to Use Parallels Desktop to Run macOS High Sierra as a Virtual Machine ]
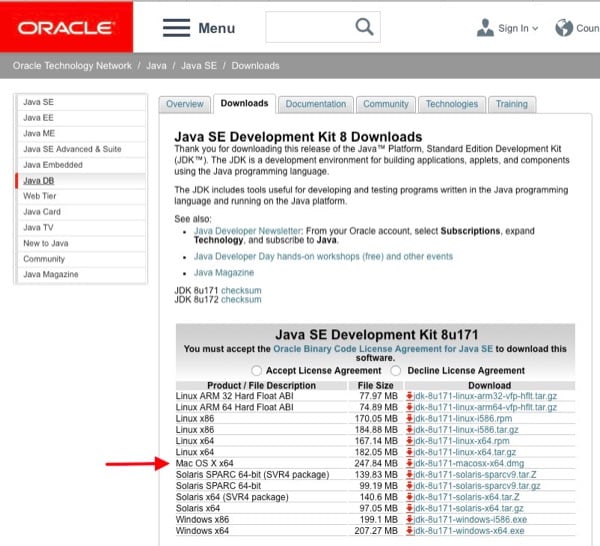
Oracle’s Java SE download page.
You’ll recognize the download file because it’s a standard .DMG file. Inside is the install package. Java installs just like any other Mac application that uses a package installer.
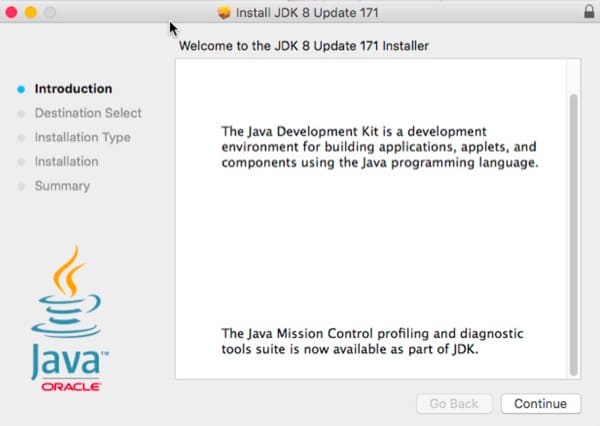
Java 8 installer.
When done installing, you may want to verify, in the terminal, that you have Java 8 properly installed. It should look like this:
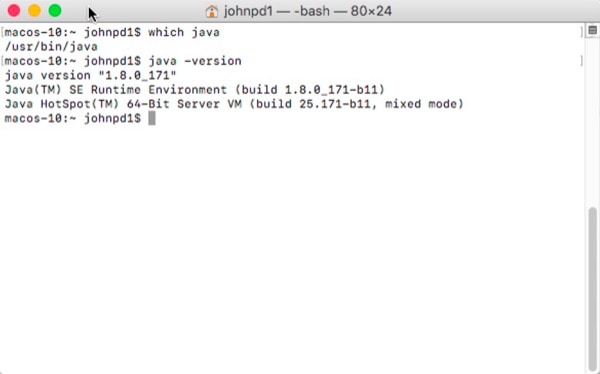
Confirm Java installation.
Page 2: The NetBeans install is next.
NetBeans Install
Step #2. NetBeans 8.2. Go to the NetBeans download page. Verify in the pop-up at the top right that the site has detected you’re in macOS/Mac OS X. Here’s what you’ll see.
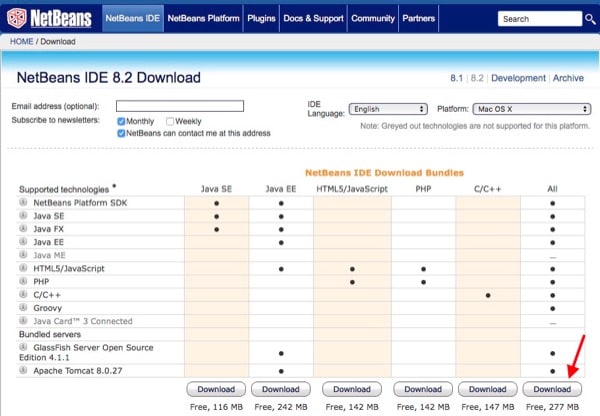
NetBeans Download page.
You’ll want to download the right-most version, labelled “All.” It’s 277 MB. You won’t be using everything this version has, but it has the minimum components that we’ll need later. Again, this is an installer package inside a .DMG file. After you agree to the license, select the desired destination.

NetBeans destination.
Next, when you get to the ‘Installation Type” phase, select “Customize.” This is very important. .
Related
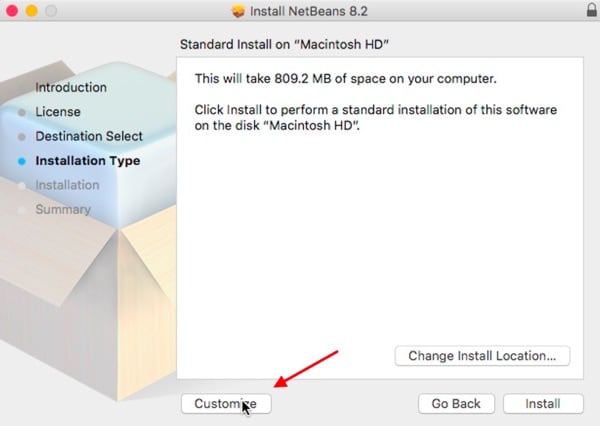
NetBeans customize.
Here are the boxes you’ll check. When done, click “Install” on the bottom right.
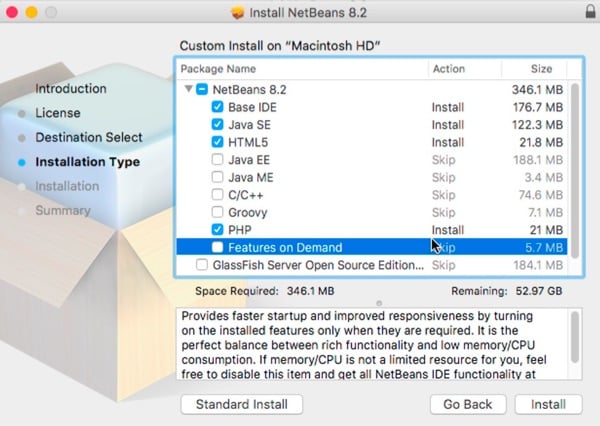
NetBeans options.
If all went well, you’ll see this:
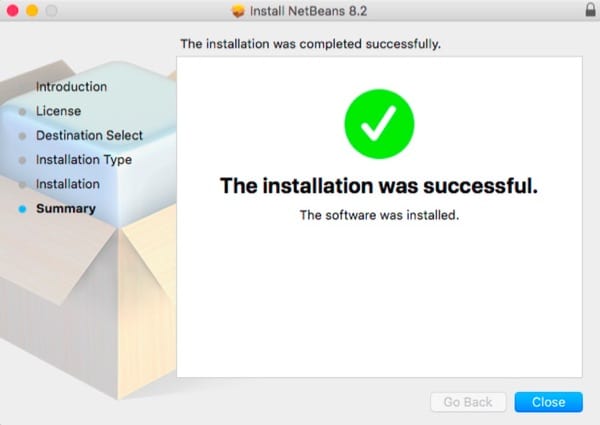
NetBeans success.
NetBeans is installed exactly where you’d expect: in your Mac’s Applications folder. For future use, you may wish to drag the app into your macOS Dock.

NetBeans app in macOS Dock.
Next Steps
That’s all I have room for here in part I. In the next installment, I’ll show you how to set up your NetBeans environment, create a named HTML project, select a default web browser, write HTML code, run it locally and find your errors with the NetBeans IDE.


0 Response to "How to Install NetBeans to Write and Debug HTML on Your Mac for Free, Part I"
Post a Comment