How to Create a Personalized HTML Email Signature
Have you ever wanted to create a personalized HTML email signature? Maybe you’re not satisfied with “Sent From My iPhone” or you have a business you want to promote. Learning HTML would take a whole other technical article, so we’ll use a signature generator.
Using an HTML email signature in Apple Mail is a little complex, and will require us to use the Terminal, but you can copy and paste the commands below.
Create a Placeholder Signature
First, we’re going to open Apple Mail and create a placeholder email signature. In Apple Mail > Preferences > Signatures, click the plus (+) button to create a new signature. For ease of use, you could name it HTML. Your name and email will automatically fill the window, but to make it a tad easier later, replace it with placeholder text as you can see in the below image.
After you create the signature, drag and drop the NAME onto iCloud in the sidebar. This lets you use the signature across your Mac, iPhone, and iPad. Finally, at the bottom, uncheck the box next to ‘Always match my default message font.’ Close the preferences window so it will be saved.
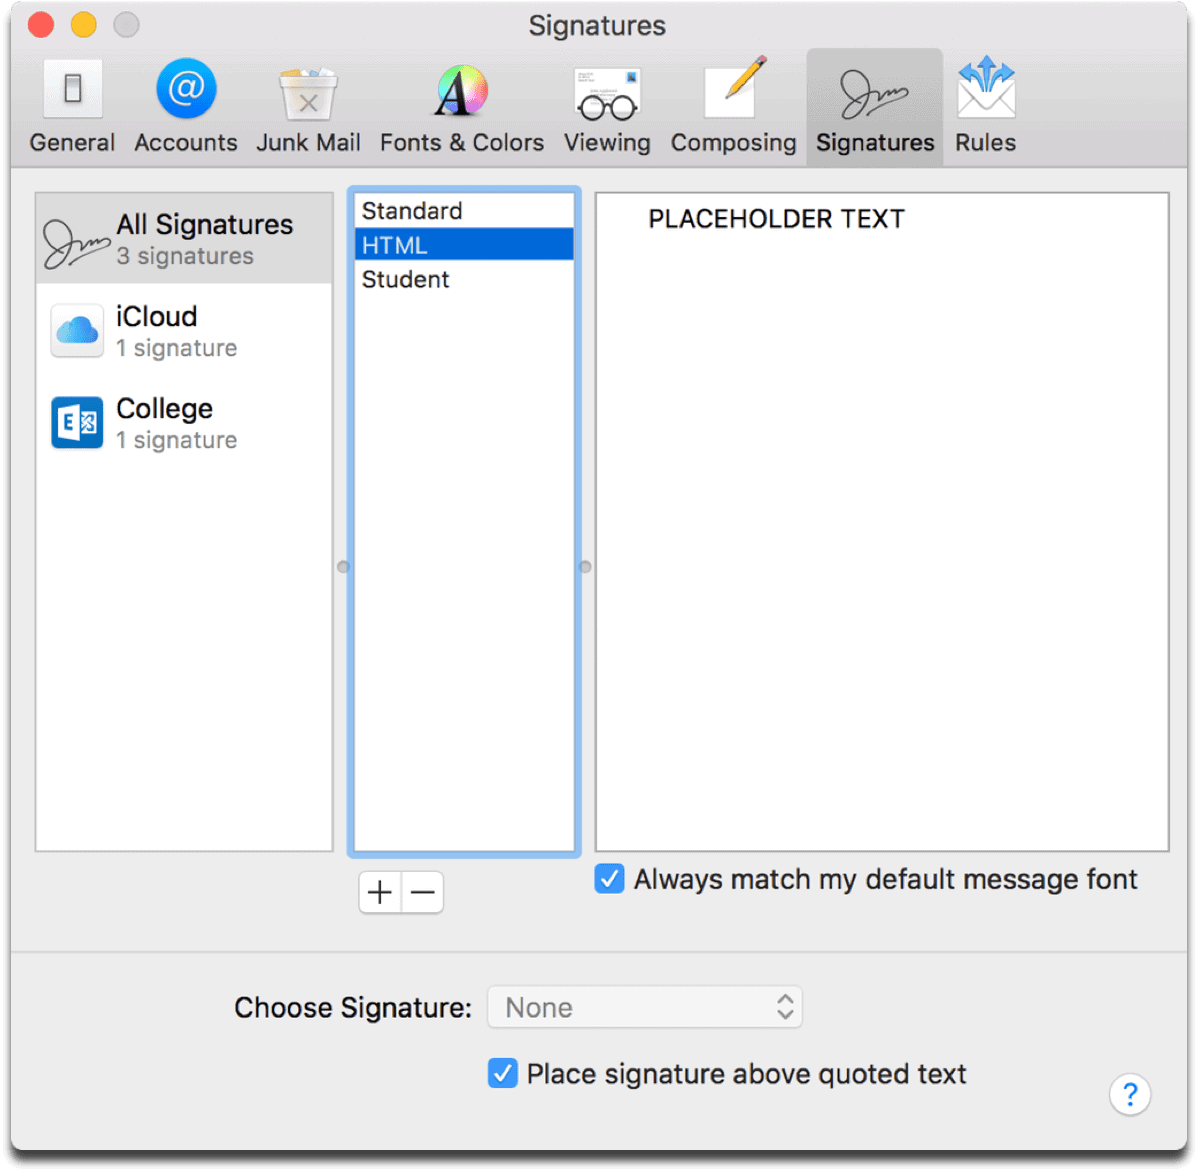
Creating a signature with placeholder text to make it easier to find
Using an Email Generator
Instead of learning to code HTML, we can search the web for a free HTML email signature generator. The one I used was at HubSpot. Once there, you can fill out your personal information you want to include in your signature.
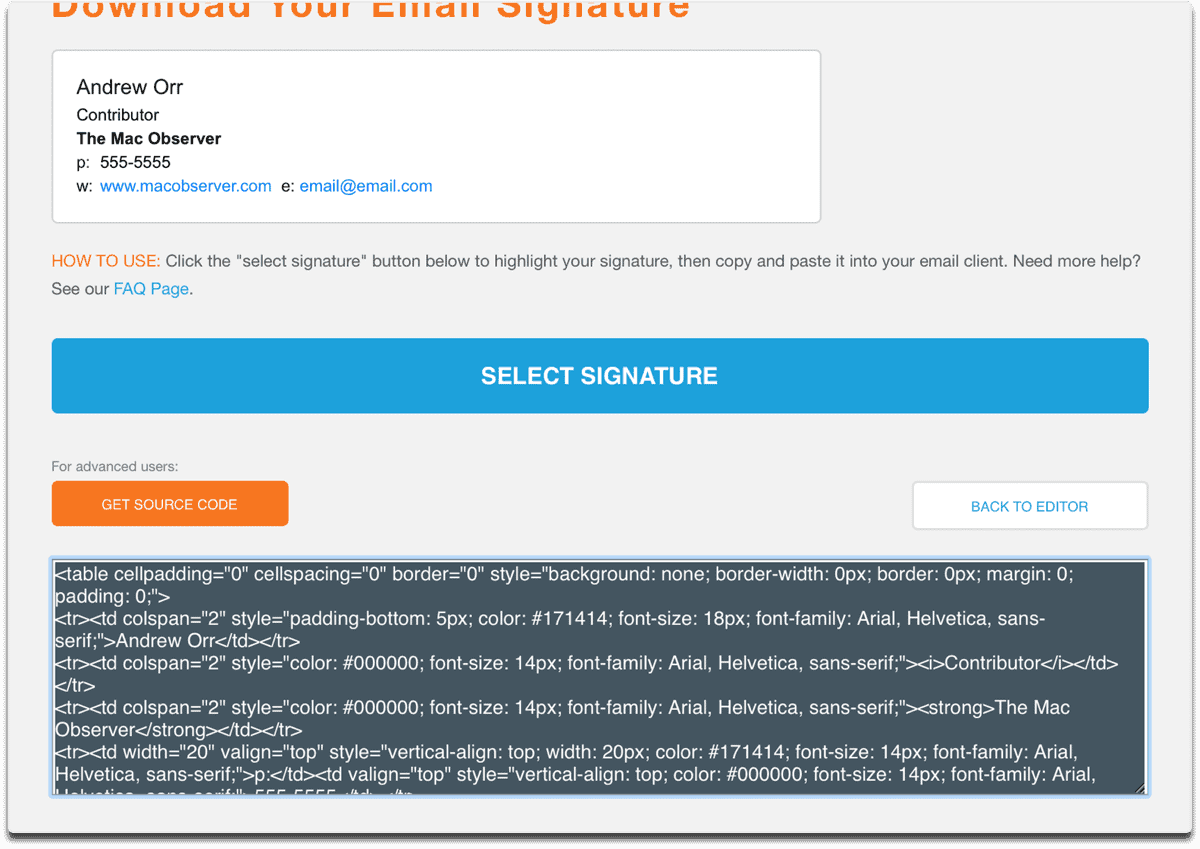
Finding and copying the source code
Once you click the Create Signature button, it will make you fill in forms relevant to your business. I just picked random ones, and it doesn’t require you to sign up for anything. After this you can hit the Download Email Signature button. It will bring you to a new screen.
Look for the button that says Get Source Code. This step is important. Copy and paste the code from the box into TextEditor. Save the file as something like emailsignature.txt.
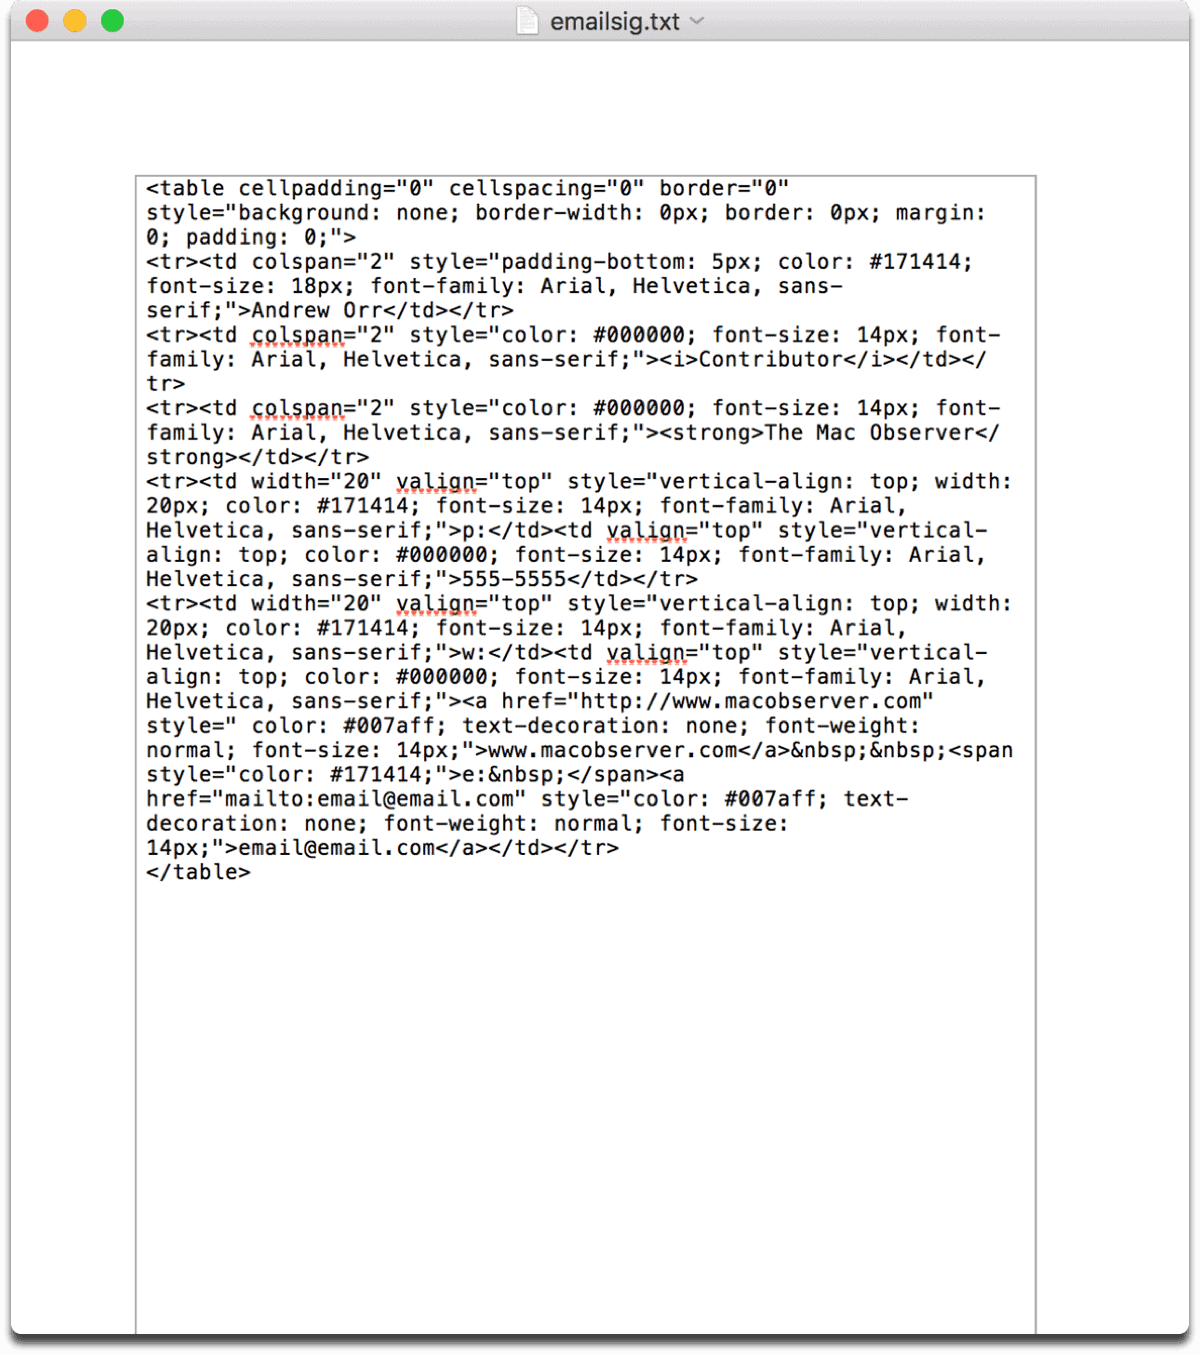
Pasting the source code into TextEdit
TerminalTime™
Now it’s time to head into the Terminal. Apple Mail signatures are saved as special files with the .mailsignature extension. These aren’t easy to find when browsing in Finder, even if you show hidden files. Instead, it’s much easier to use Terminal.
Since we used iCloud to save the signature, the code you can copy and paste is:
ls -laht /Library/Mobile\ Documents/com apple mail/Data/V4/Signatures/
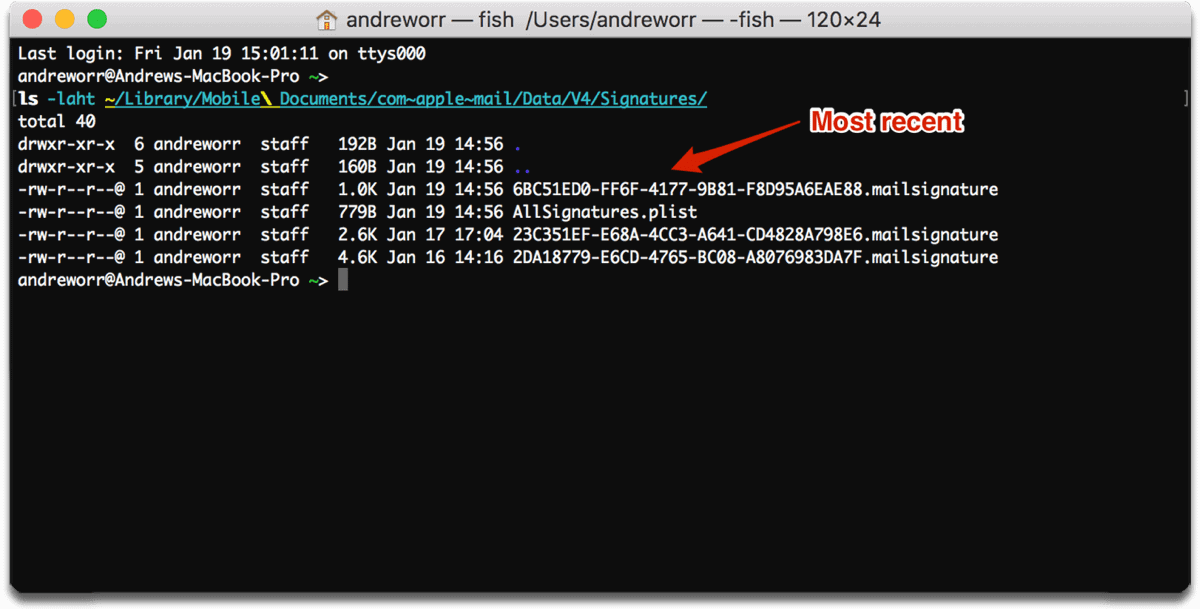
Listing the .mailsignature files
This will bring up a list of email signature code. Your most recently created signature will be at the top of the list, ending with .mailsignature. Now, we’re going to open those files in TextEdit with the following command:
open -a TextEdit /Library/Mobile\ Documents/com apple mail/Data/V4/Signatures/*.mailsignature
This will open TextEdit with each .mailsignature file. If you have more than one signature, more than one TextEdit tab will open. Find the one that matches the corresponding most recent file in Terminal. For me, I have to search for the one that begins with 6BC. It will probably be the first tab.
Remember when we used PLACEHOLDER TEXT? It should be easy to find in the TextEdit window, so you know you have the correct one.
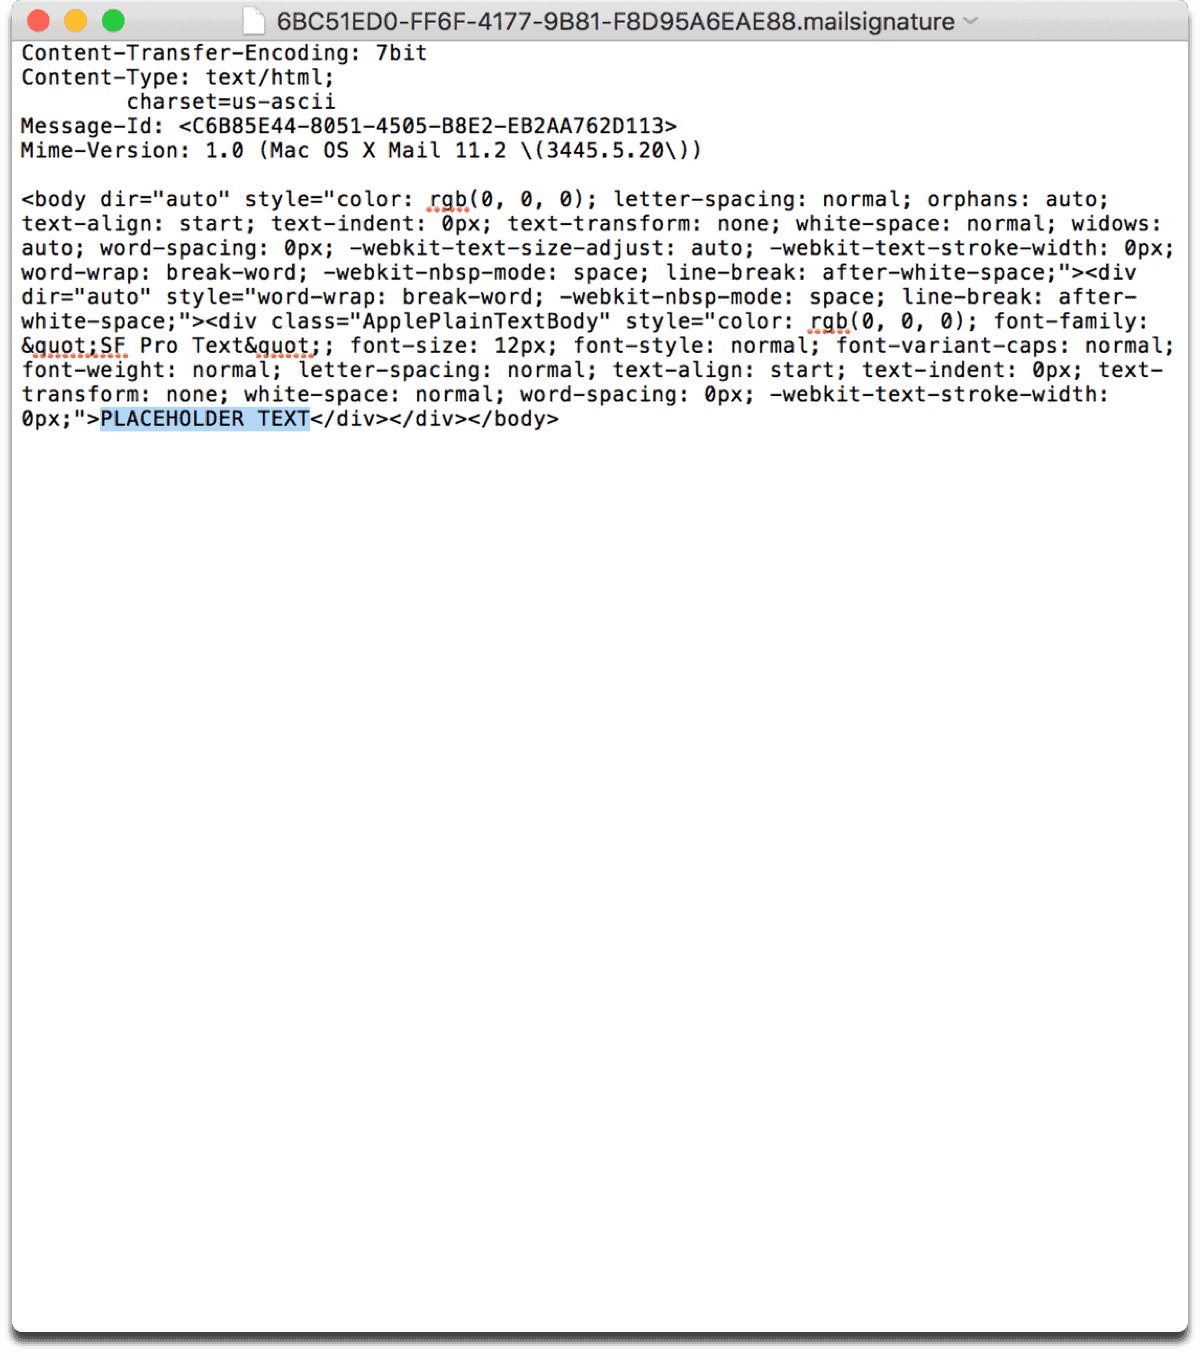
The placeholder text lets me know I have the correct file
Cut & Paste
Related
In the mail signature file in TextEdit, highlight the code and delete it. Make sure to keep the header, and ONLY delete the text that begins and ends with <body>, as shown in the below image.
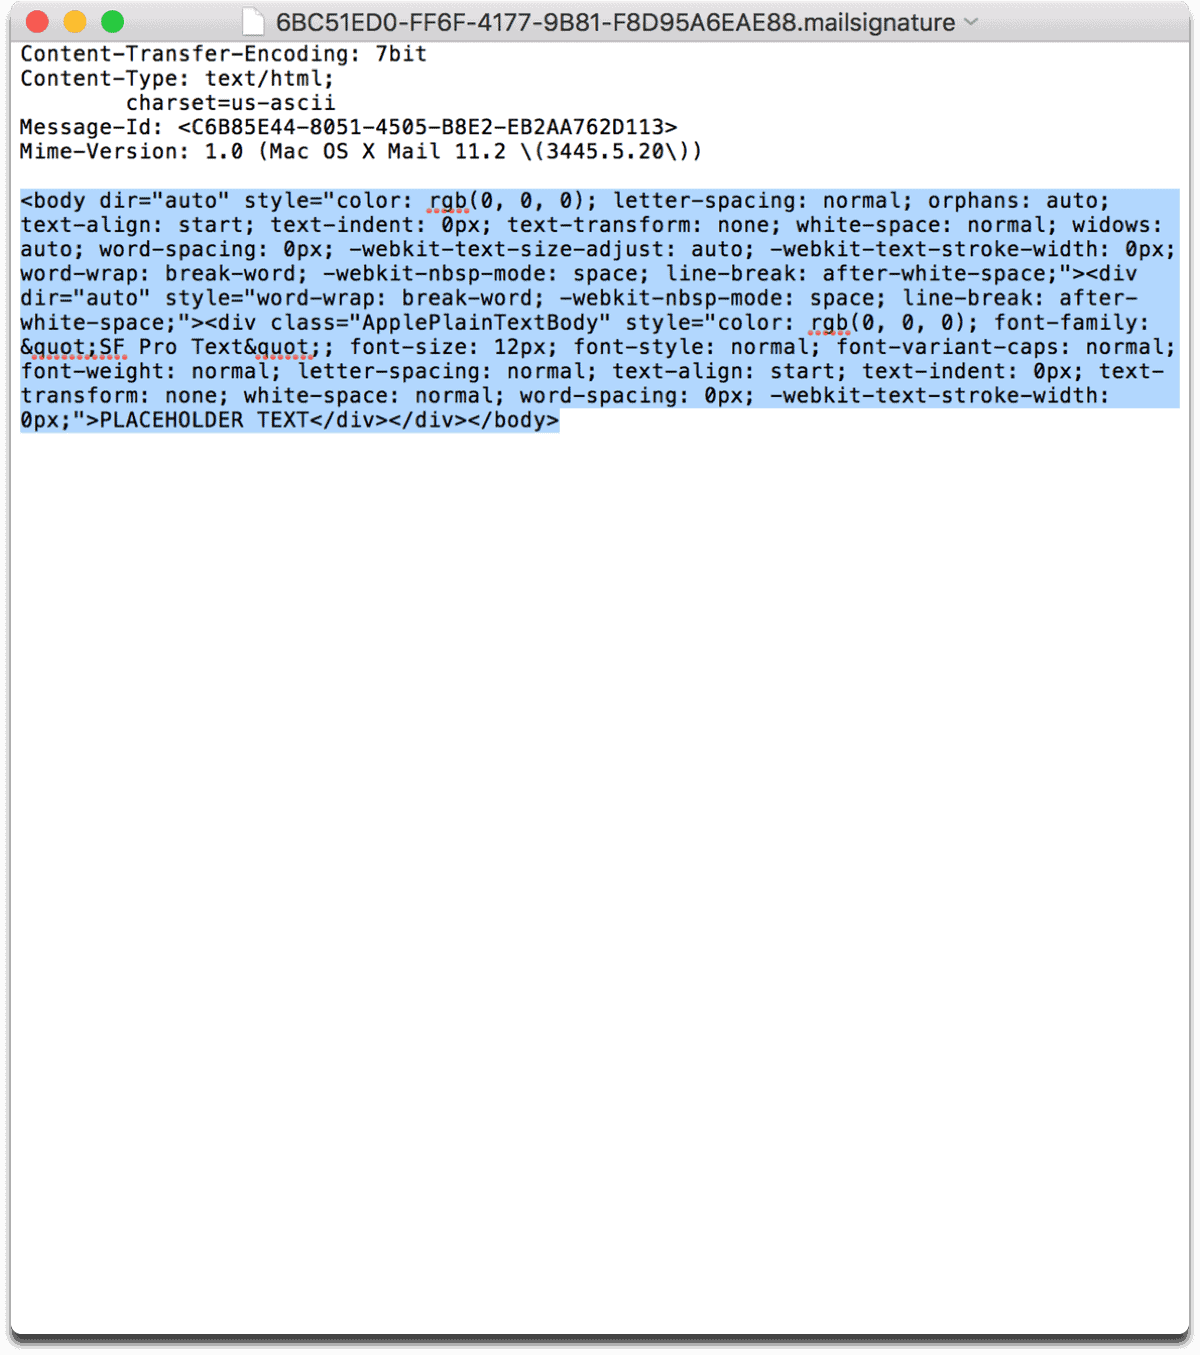
Only delete the highlighted text
Now, open the email signature file we created earlier. Copy and paste the HTML code in the exact same space that the old code inhabited, as seen below. After that, you can save and close TextEdit.
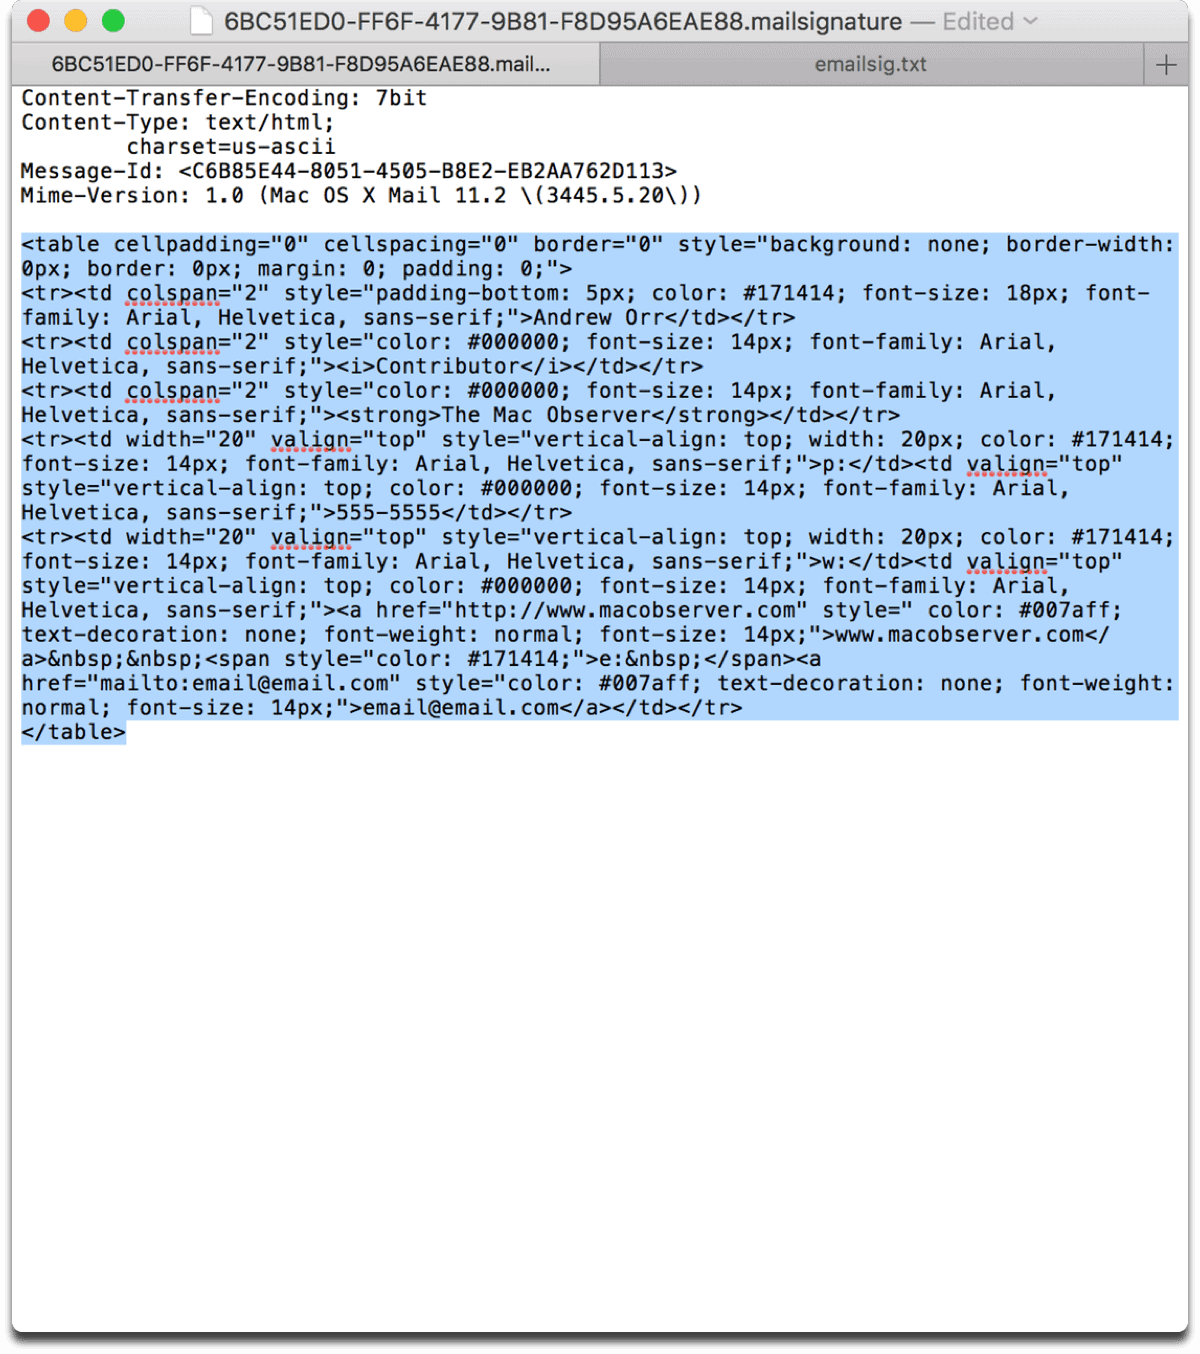
Pasting the code for our HTML email signature
Back to Mail
Finally, we can go back to Apple Mail. Open up Preferences again and go to the signature you created. You’ll see the new HTML signature in the right pane.
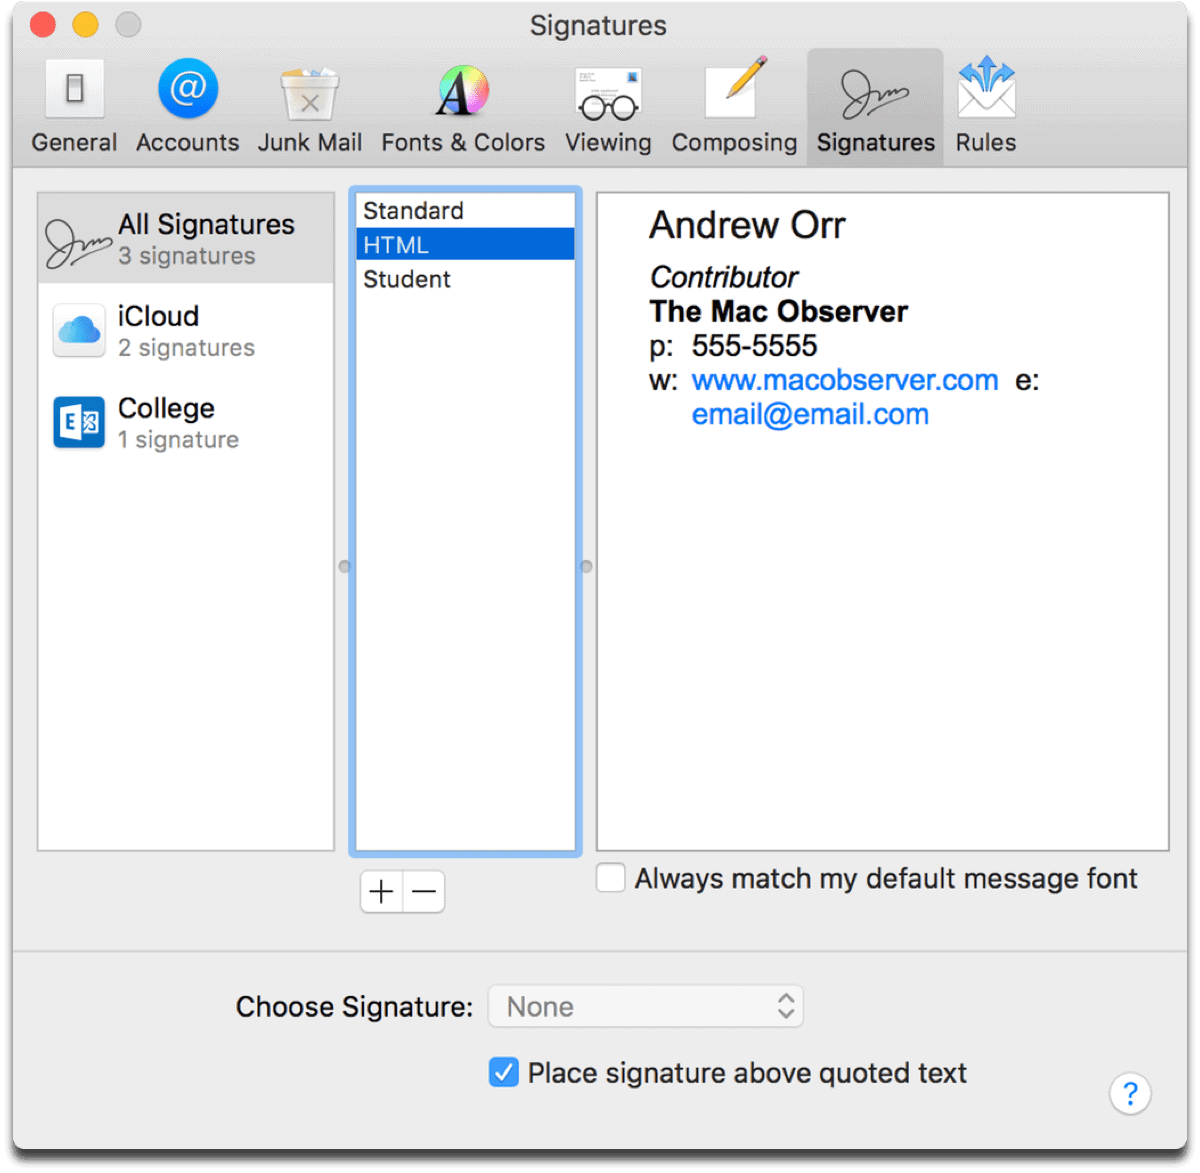
Seeing our new email signature
If the signature looks a little funky, like mine does, you can repeat the above steps. And, if you know HTML code, you can customize it to your liking. But that’s outside the scope of this article.

0 Response to "How to Create a Personalized HTML Email Signature"
Post a Comment