6 Things You Can Do To Improve Your iPhone Photos
Apple says that the iPhone is the world’s most popular camera. On sites like Flickr, there are more photos taken with the iPhone than other cameras. And the iPhone camera is improved every year, like with the iPhone 8/8Plus.
But no matter which iPhone you have, you can make use of these tips and tricks to make your iPhone photos look great. We’ll start with three things to do before you take the shot, and three things you can do after the shot.
And don’t worry, you won’t need fancy equipment or apps. While there are plenty of great camera apps and editing apps in the App Store, these tips can be used with the iPhone’s default camera, and the editing tools found in Apple’s Photos app.
Before the Shot: Lighting
Photography is all about capturing light, so having great lighting is essential. Lighting can convey brightness and darkness, but also tone and mood. For portraiture, I’m personally in favor of using natural light over the iPhone’s flash. The flash gives you flat light that can sometimes make a person’s face look flat and washed out. The shadows are also thrown behind the person.
With natural light, you can position the person to get more of a nuance of shadows, making certain facial features stand out. Or, if you have an iPhone 8 Plus, Apple lets you control this in the software with Portrait Lighting.
For outdoor photos, the sun is our guide. Generally, the best times for outdoor iPhone photos are early morning and late evening. These times are called golden hour. Because of the sun’s position in the sky, it gives off a soft, golden light. This is perfect for portraits.
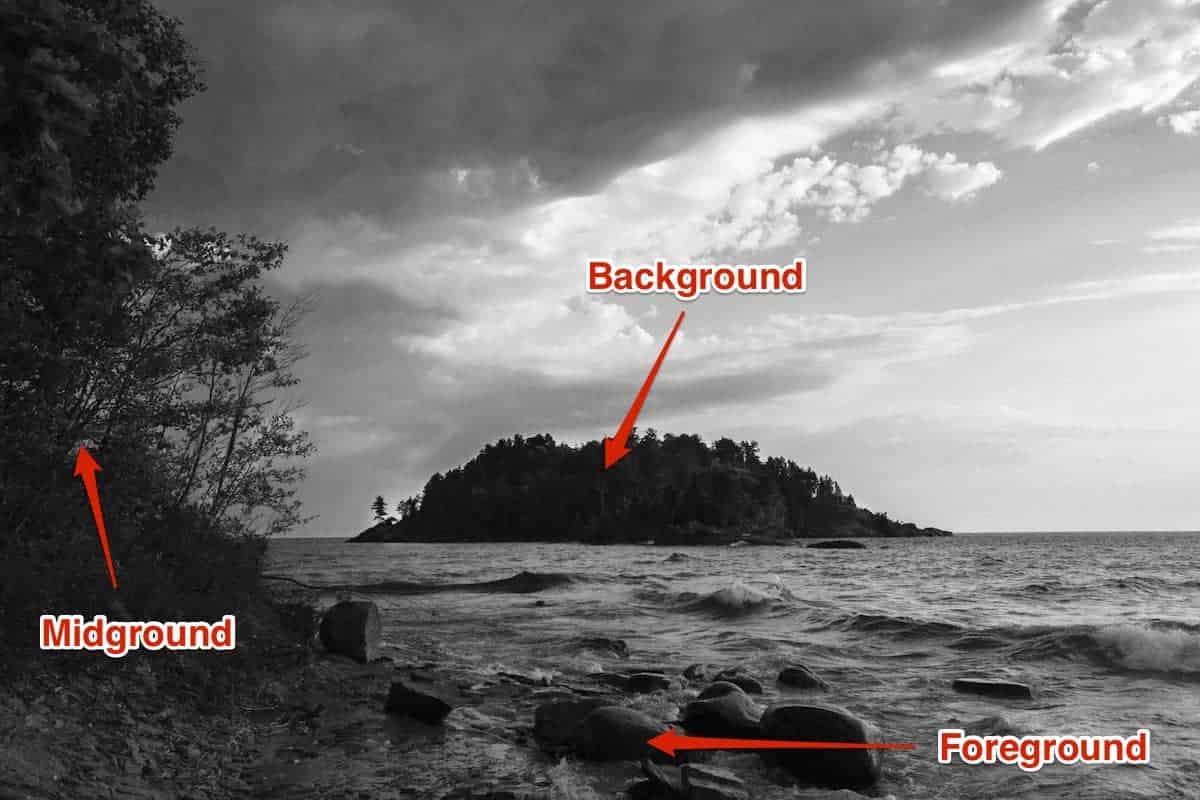
Foreground, midground, background.
Before the Shot: Depth
Photography is also about capturing a 3D world, with the end result being a 2D image. Adding depth and perspective to your iPhone photos is an easy way to improve. It invites your viewers to explore the scene, instead of focusing on just the subject. If you shoot something far away, including objects in the foreground will give people a sense of scale.
Three depths to keep in mind, from closest to furthest, are: foreground, midground, background. If you shoot something close in the foreground, include things in the midground and background. For photos in the midground, you can choose between including an object in the foreground or background.
If you shoot something far away in the background, include things in the foreground and midground. Don’t be afraid to change your viewpoint too. Instead of shooting at eye level, what about crouching close to the ground?
Next: Composition, Highlights and Shadows
Page 2 – Composition, Highlights and Shadows
Before the Shot: Composition
Composition means framing the subject in a certain way. While there are no hard rules in photography, you can use compositional rules as guidelines. You can use these rules to guide your viewer’s eye to a certain part of the photo, or create balance between the subject and background.
The most basic compositional rule is called Rule of Thirds. On your iPhone, go into Settings > Camera. You’ll see something called Grid, and you can switch it on. This overlays a grid of four lines to break up the photo into nine squares. The Rule of Thirds says to position the most important elements of the scene along these lines, or at the points where they cross.
For example: landscapes. If you want to make the sky more important, you can line up the horizon with the bottom line, and keep objects in the bottom three squares. To make features on the ground important, line up the horizon with the top line, and fill the middle and bottom squares with landscape features.

Lining up the sun using the grid.
After the Shot: Highlights & Shadows
After you take the photo, now it’s time to edit. The first area to focus on are highlights and shadows. Highlights are the bright areas where the light falls. Shadows are the dark parts with no light. You’ll want to balance highlights and shadows to create tonal contrast. A basic rule of thumb is to slightly decrease highlights, and slightly increase shadows.
When we look at photos, our eyes are naturally drawn first to the bright areas of the image. You don’t want the highlights to be too bright though. This can lead to blown out highlights, which means that the highlights are so bright that they are essentially pure white. This doesn’t look good, and you lose any details in the bright areas.
At the same time, you can have shadows that are too deep, and they become pure black. Unless you’re doing this on purpose, like in low key photography, you’ll want to brighten up the shadows a bit. You can find tools for controlling highlights and shadows in the iPhone Photos app. Use the sliders to increase and decrease.

Low key photography makes use of strong shadows.
Next: Color and Grain
Page 2 – Color and Grain
After the Shot: Color
Unless you stick to black and white like me, color is the next thing to focus on. There are different tools that control colors. Things like saturation, vibrance, and temperature. Saturation lets you control the intensity of a color. Increasing saturation makes iPhone photos look more colorful, but it can also look unnatural if you increase it too much.
If you slightly increase saturation, it can make skin tones look warm, which is great for portraiture. Vibrance is similar to saturation, but it’s smarter. Vibrance increases the intensity of muted colors in your photo, and it leaves already-saturated colors alone. If you use a tool that has both saturation and vibrance, I recommend using vibrance.
Temperature makes the photo look warm or cold. You can control the temperature to match the subject. For example, you can decrease the temperature a little in a winter photo. This emphasizes how cold it is. For autumn or summer photos, increasing the temperature gives a warm, cozy feeling. Color tools are found in the iPhone Photos app.
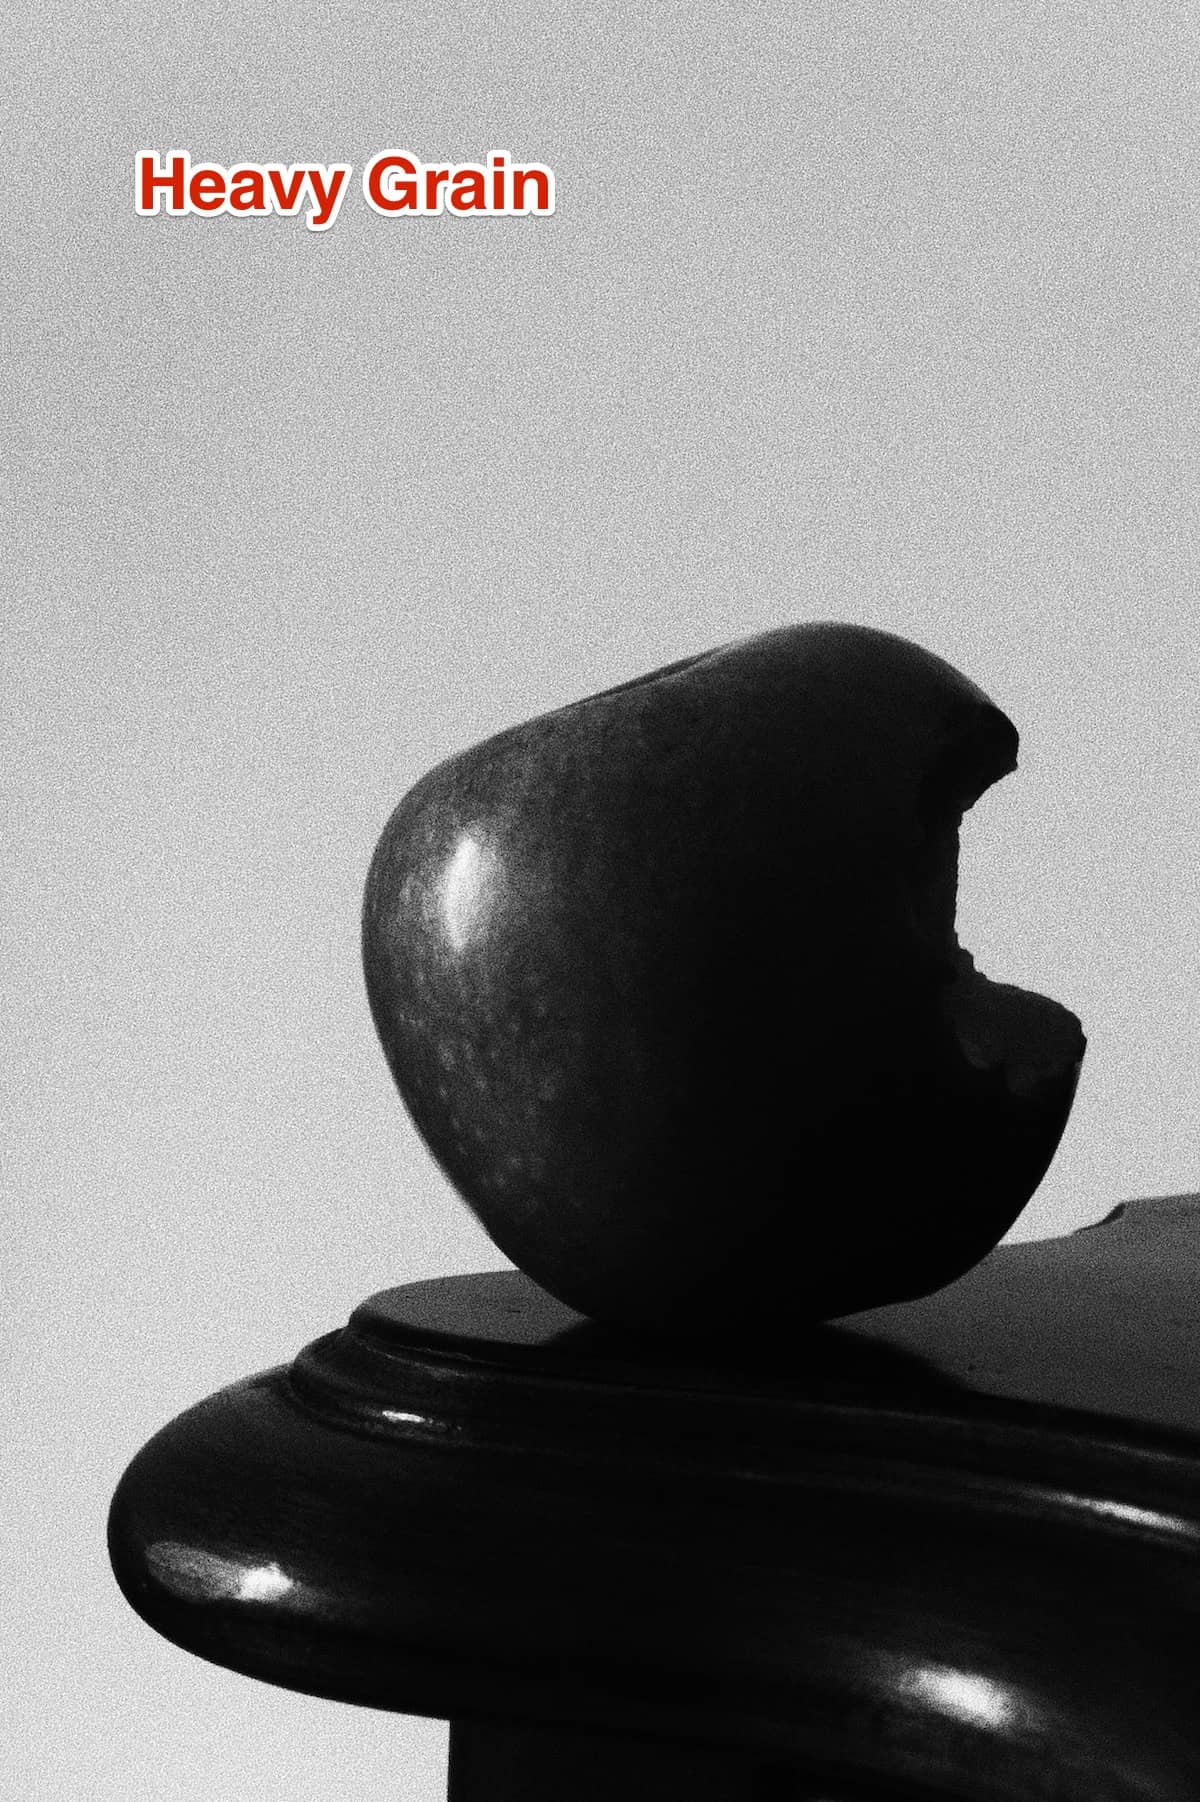
Adding heavy grain to iPhone photos.
After the Shot: Grain
Copying old school film photography is all the rage nowadays. Adding a bit of grain (also called noise) to your photo adds texture, and counters the smooth, almost plastic look that digital cameras create. Grain looks good with black and white photography. For color photography, you can add grain, slightly decrease contrast, and slightly decrease saturation for a quick analog look.
In the Photos app, the grain tool and be found under black and white. Add all of the grain you want, then tap the B&W button to bring it back to color. Grain is virtually traditional in black and white photography. Some people don’t like grain in color photos, and that’s okay. Above all, experiment! Try different filters, editing tools, and camera techniques. Find your style and stand out.
0 Response to "6 Things You Can Do To Improve Your iPhone Photos"
Post a Comment