How to Restore Files to an External Drive with Time Machine
I recently ran across a client whose Photos Library had disappeared. Completely! Along with the rest of the contents of his Pictures folder. Did his cat somehow manage to jump on the keyboard, press Command-Delete, and then empty the trash? Did his kids do it while just fumbling around? Who knows. All’s I know is that it was time for…well, his Time Machine backup. The problem? He’d added a bunch more files to his Mac in the meantime, and his drive was now too full to accommodate the Photos Library being copied back onto it. Yikes.
So what I did was use Time Machine’s “Restore to” option to copy his huge library onto an external drive, leaving him with some room left to grow within his Mac’s storage and getting his data back in the meantime. If you ever need to do this yourself on a file or folder, the process is really simple—first, make sure your backup drive is either plugged into your Mac or on the same network (if it’s a wireless backup, like a Time Capsule). Then plug in the external drive you want to restore your backed-up files to. Once both are ready, click on the Finder icon in your Dock, which is the blue smiley face.

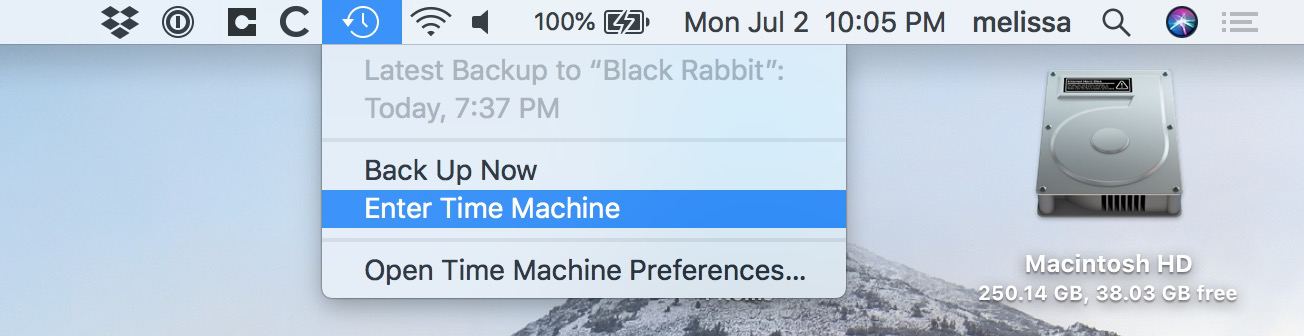
Within the Finder window that’ll open, navigate to the folder you’d like to restore from. For example, if you want to get back an item from your Documents folder, open that; if you need your whole Photos Library, navigate to the Pictures folder. Once you’re sure you’re in the right place, click on Time Machine’s circle-clock icon in your menu bar and choose “Enter Time Machine.”
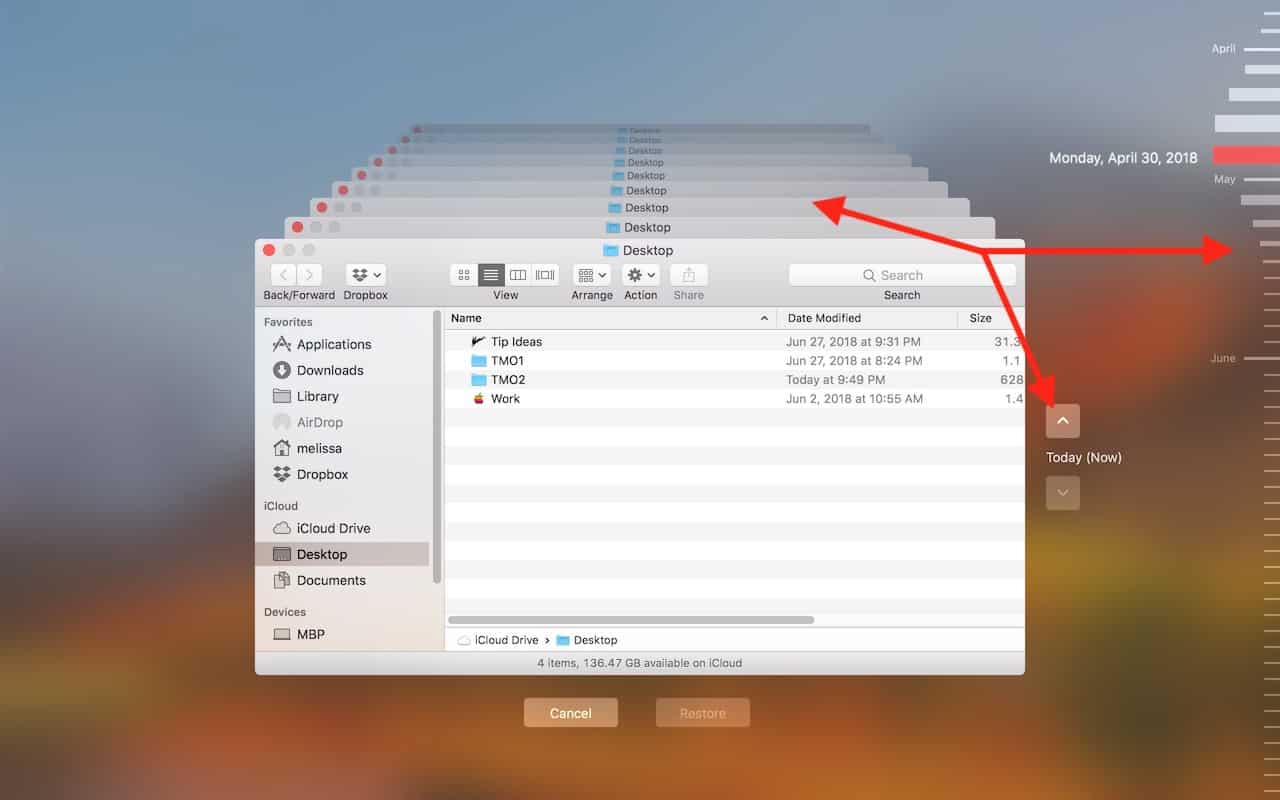
When you see the Time Machine interface, click the ladder-like date ranges on the right, the arrows in the middle, or the windows at the top to go through and find the date from which you’d like to restore your file or folder.
When you get there, click on the item to select it for restoration, and then find the gear icon in the toolbar. If you click that, you should see “Restore [item name] to.”
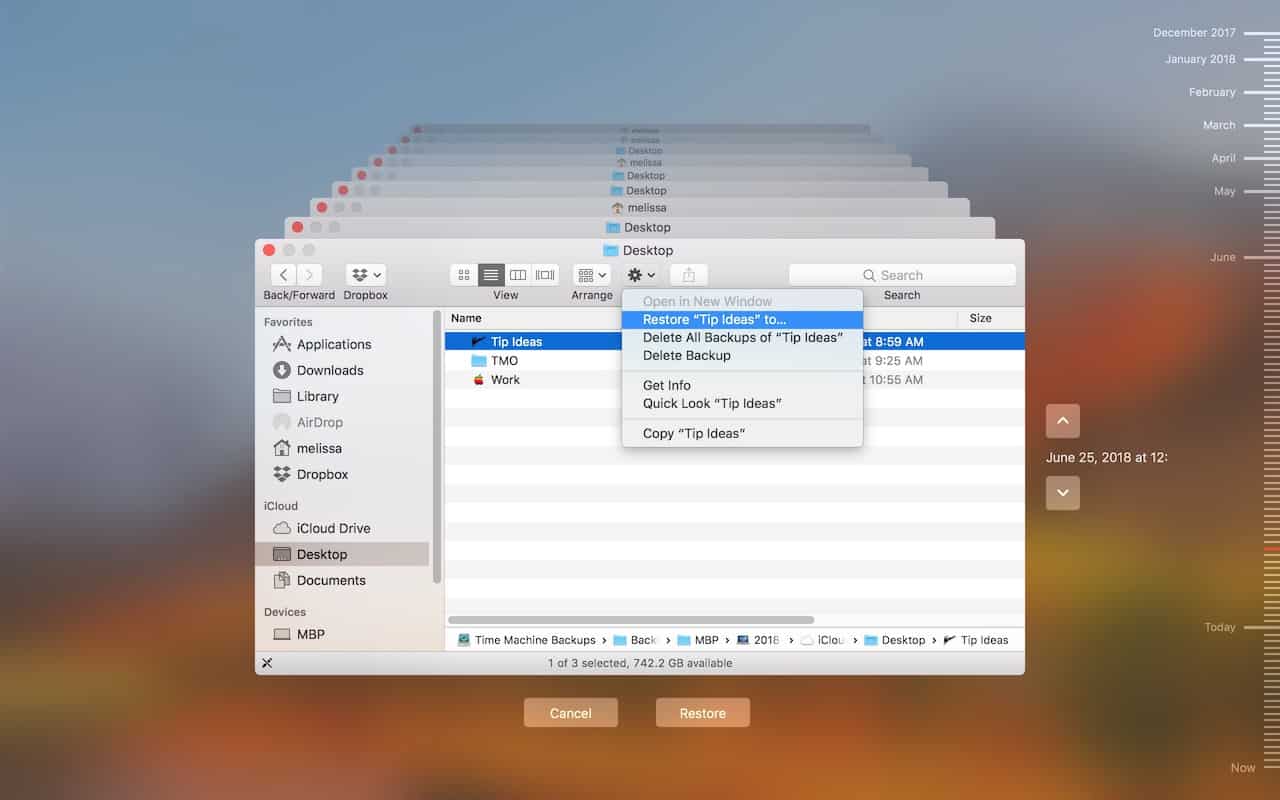
With that command, you’ll next see a window asking you to choose where to put the restored files…

Related
…from which you’ll scroll down on the sidebar to find the external drive you plugged in, within the “Devices” section (as I’ve shown above).
If you pick the drive (or a folder within it) as your destination for your recovery and click “Choose,” you’re good to go. If necessary, a progress bar will appear with the time remaining on your task. One more thing, though…if you restore something important (like your Photos Library!) to an external drive and don’t intend on pulling it back onto your Mac at any point, you’ll need to figure out a way to back it up as it changes. To do so, you could consider removing the external drive from Time Machine’s exclusions list, which’ll mean that it’ll back up along with the contents of your computer to your Time Capsule or your locally attached Time Machine drive. Or you could schedule a regular clone of it to yet another drive using something like Carbon Copy Cloner. In any case, just be sure the recovered drive isn’t the only place it lives going forward. It’d be a bummer to add a thousand pics from your daughter’s graduation only to have them disappear in a crash, right?

0 Response to "How to Restore Files to an External Drive with Time Machine"
Post a Comment