iOS: How to Create an iCloud Website For Your Photos
Apple has a hidden ‘social network’ of sorts in the iOS Photos app. You can create albums and share them with friends and family. But you can also create a shared album that creates an iCloud website. This lets you share photos more publicly, and anyone who has the URL can view them.
Publicly Shared Album
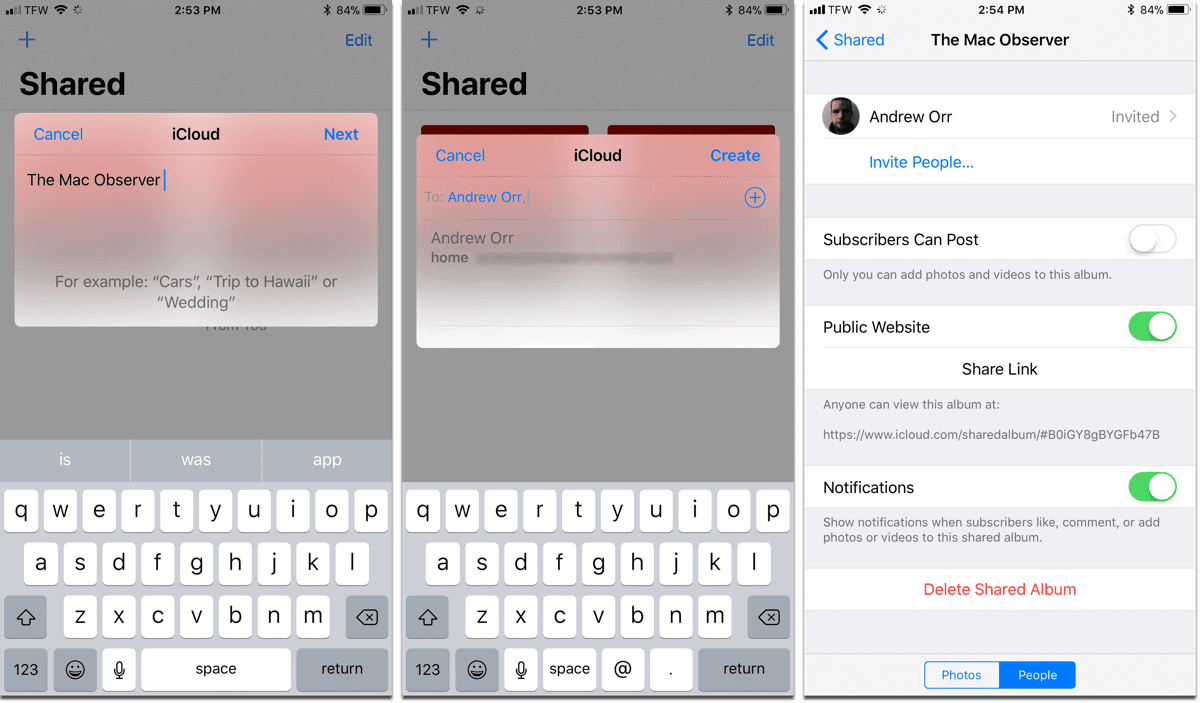
- To start, open up the Photos app on your iPhone or iPad. Tap the Shared icon at the bottom.
- Next, tap the plus (+) sign at the top left. Name your album, then tap Next. Here’s the important part: in the next screen you can add other people. Only add yourself, by typing in your email. Then hit Create.

- Then, tap on the album you just made. Down at the bottom, tap the People tab.
- Here you’ll see a switch that says Public Website. Turn it on.
It will create a public iCloud website. You can choose if subscribers can post to it or not. People can view this on their iDevices or on the web.
0 Response to "iOS: How to Create an iCloud Website For Your Photos"
Post a Comment