macOS: How to Remove a Time Machine Backup Disk
If you back your computer up to multiple drives using Time Machine, you may be familiar with the notification that tells you that you haven’t been backed up in [insert long amount of time here]. You see, if you’ve configured more than one Time Machine disk, your Mac will take turns backing up to each of them when they’re plugged in or connected over your network; you’ll get the warning I mentioned when one of your disks hasn’t been used for a while, even if the other backups are working fine.
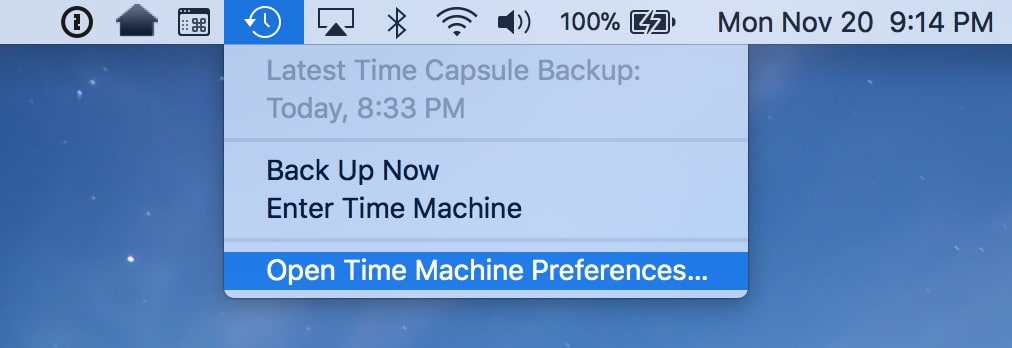
The solution to that is of course to plug in the missing backup and let it run, but what if you no longer own the drive in question? Or if it failed or got run over by a giant chicken or something? Well, to stop Time Machine from warning you about the lost backup drive, you’ll need to remove it from the preferences on your Mac, which is luckily darned easy. To get going with this and stop those pop-ups, start by clicking Time Machine’s circle-clock icon in your menu bar and picking “Open Time Machine Preferences.”
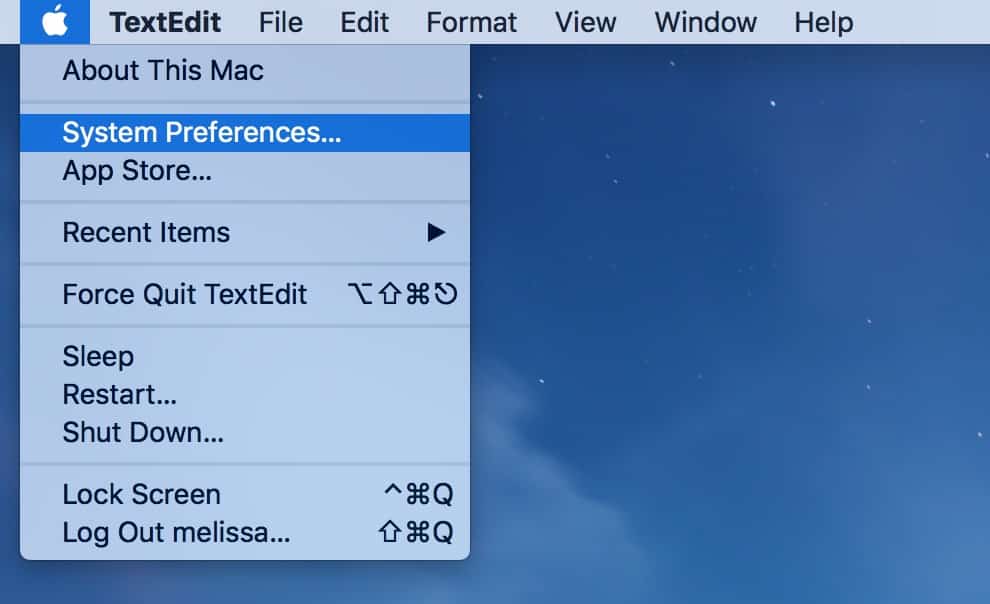
If you don’t see the circle-clock near the top-right of your screen, you can instead use the Apple Menu to open System Preferences…
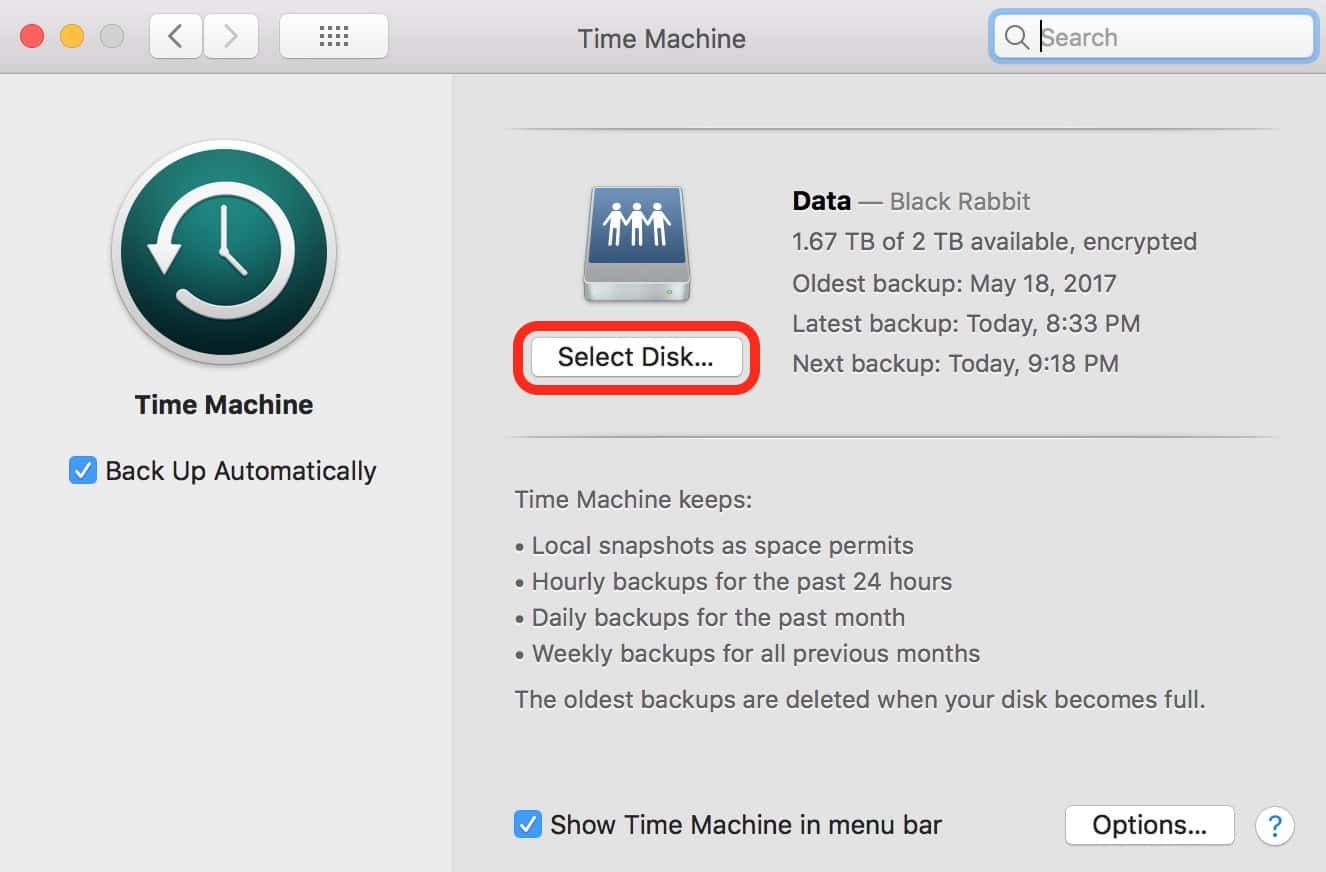
…and then you’ll click “Time Machine.” Whichever way you get there, though, the Time Machine preference pane has the option to remove a disk under the “Select Disk” button.
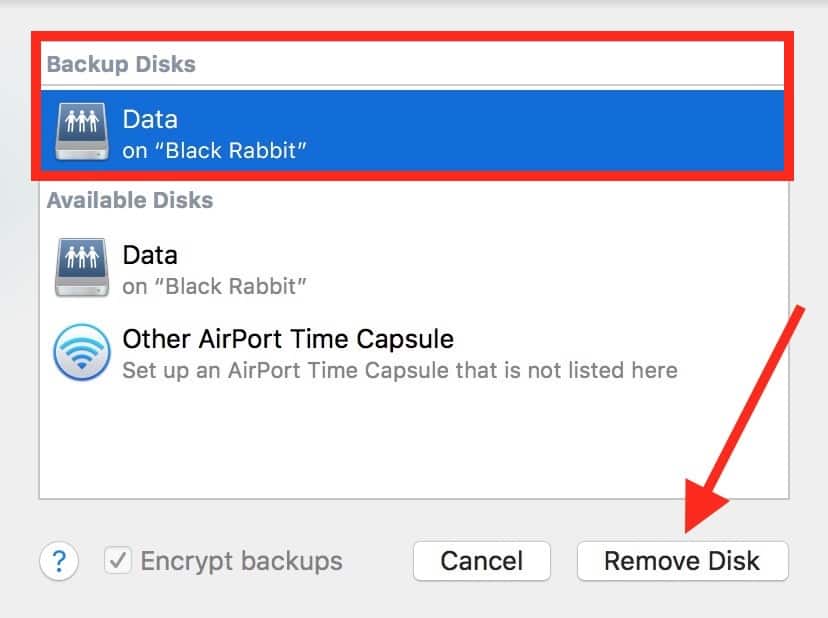
Within that section, you’ll find your list of backup disks at the top. Click the one you want to get rid of, and then choose “Remove Disk.”
And that’s it! No more pop-up warnings. But, I mean…you’re still backing up, right? You didn’t remove ALL of your disks to stop the notifications? Because you’ve gotta have at least one onsite backup. Preferably two. And one offsite backup.
The number of times I mention this should tell you how important it is to me that you all have a solid backup system in place. I’m like a broken record here.
0 Response to "macOS: How to Remove a Time Machine Backup Disk"
Post a Comment