macOS: How to Create a Mac Panic Button With Automator
Automator, like the new iOS 12 Shortcuts app, is a powerful Mac automation tool that lets you string together actions and make a workflow or app. And I’ve used it to create a Mac panic button.
[Batch Rename Multiple Files With This Simple Automator Workflow …]
Mac Panic Button
Whatever your reason, you may find yourself in a circumstance where you want to quickly get rid of files, apps, or ahem Linux ISOs. Here’s how the Mac panic button can help. I set it up so that it automatically deletes certain things, and then delete’s the Trash.
- Open Automator and create a new document. When it asks you for the type of document, select App.
- In the sidebar, drag the following actions. Under Files & Folders, choose Get Specified Finder Items. Then choose Move Finder Items to Trash. Finally, under Utilities, drag and drop Run AppleScript.
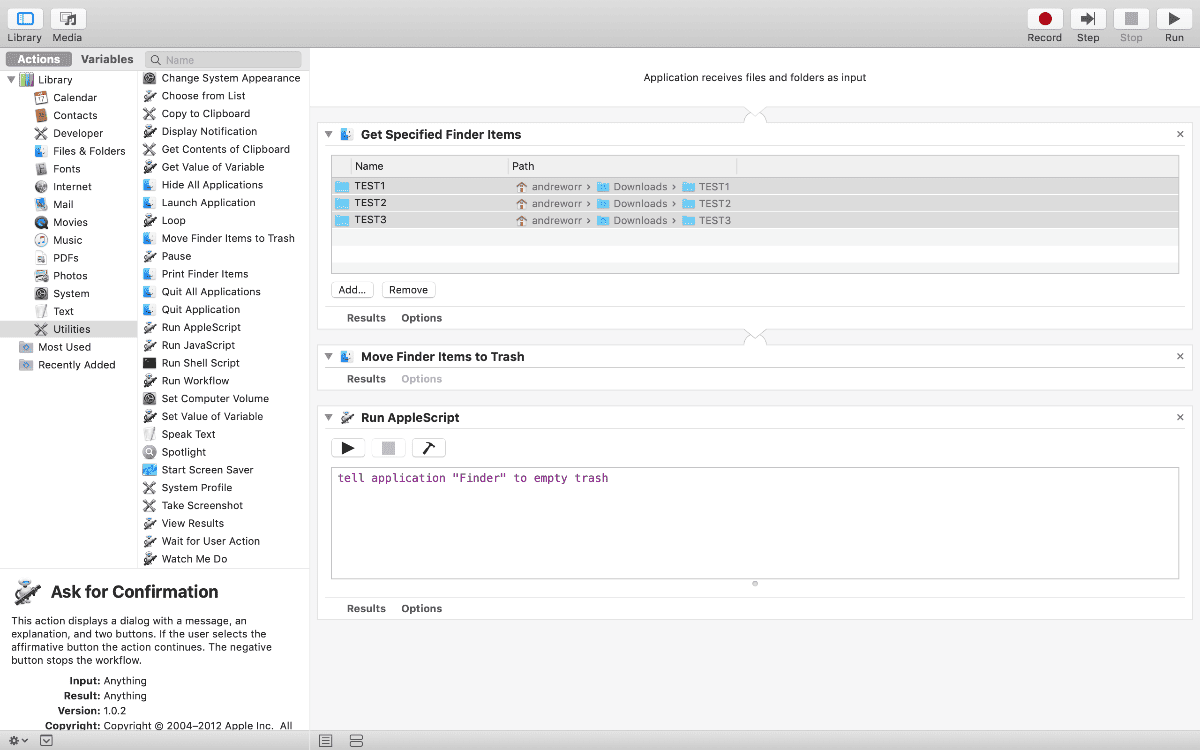
- Inside Get Specified Finder Items, this is where you add the content you want to delete. You can drag and drop or click the Add button.
- Inside Run AppleScript, delete all of the pre-written text inside. Copy and paste the following: tell application “Finder” to empty trash.
- Press Command (⌘) + S to save your document, and name it whatever you want. I named my panic button “Order 66” :).
- Finally, go to iCloud Drive > Automator and drag the new app onto the dock.
You’ll want to create a few test folders to make sure the app works to your liking. If you ever need to execute Order 66, just click the app in the dock.
[macOS: How to Archive iMessages with Automator]
0 Response to "macOS: How to Create a Mac Panic Button With Automator"
Post a Comment